Showing posts with label sewing. Show all posts

Wednesday, July 17, 2013

Challenge: Week 5

Ombre is a trend I have been completely taken with. I absolutely love, it seems, all things ombre. Maybe I've even painted my nails ombre.


I've thought about painting my sewing desk ombre...

via Pinterest

Dreamed about painting my houses' staircase ombre...

via Pinterest

And bought the supplies to make dip dyed ombre curtains out of some bland blackout curtains we already owned (bought the supplies almost a year ago but havent done yet). 

via Pinterest
Despite this love of ombre I didnt even think of it when brainstorming for my categories. Thank God Manda did!

Per usual, I was kinda torn about what i wanted to do for the challenge. I thought initially that I would make a whitedress and   then dip dye it.  During a conversation with Manda, I realized this was probably a bad idea. I told her my plan to dye my fabric and her exact words were "Ain't nobody got time for that shit". True words. I had ombre fabric in my stash. I used that. 

I made Simplicity 1662 view B.


Super easy until I was putting on the waistband. I have no idea what happened, but i had way more fabric then I needed, and it wasn't   supposed to be gathered. Not wanting to take any of the stitches i had already put in out, I just took a couple tucks. LAZY.


I really like how it turned out, but i think I'm  gonna have to secure the front "flap".  It's windy in New England and I'm afraid that if I don't things are gonna get indecent. 

Friday, July 12, 2013

Birthday Dress

I have a problem; actually it’s more like a condition, where I wait till the last minute for EVERYTHING. Not only am I a procrastinator, but I’m also a perfectionist.  This is NOT a good combo.  Waiting till the very last minute and then needing everything to be perfect is a recipe for disaster.  In an internal effort to better my worst character flaws (and this is definitely one) I've been trying to be better about doing things before they are “absolutely due”.

This year when April rolled around, I started thinking about Liv’s birthday.  I had plans to make it a very cutesy, looks like I’m a stay at home mom and have tons of time, event.  She needed to be dressed as adorably as all the decorations, that I had yet to make, would be.  Not wanting to wait until the last minute I looked online and ordered her a dress from Nordstrom (my absolutely favorite department store of all time). 

When I ordered the dress I had thought it was made out of knit, but when it came in it was clearly cotton.  I tried it on Liv, and it was really cute…..and really WHITE.  WHAT WAS I THINKING??  She was going to ruin that dress in 3.5 seconds….and I had paid WAY too much for it ($38….seriously…what was I thinking).  I decided to make her a birthday dress instead, but kept the dress just in case I ran out of time.


I had basically married myself to the idea of making Liv her birthday dress, but did I leave myself enough time?  Of course not!  I finished Liv’s birthday dress at 1pm the day before her birthday.  It was intense, but I was really happy with how it turned out.

I used Simplicity 1624 for a pattern.  I LOVED view A with the ruffles.  It just looked classic little girl cute to me.  What I didn't think about when I started sewing this dress was how damn annoying those ruffles would be to attach.  They nearly killed me.


I had THE MOST PERFECT material in my stash for the dress.  I basically buy anything with weenie dogs on it as an ode to Guinness.  This print I got at Joann’s and it KILLED me.  Weenie dogs and rain boots…could it get any cuter?  NO.  The answer is no.


The dress turned out adorable.  The only thing that I didn't like about the pattern is that the waist seam was exposed inside the dress.  I like, especially in kids clothes, when this is covered.  I feel like when it isn’t, it bothers their little bellies.  So, next time (if there’s a next time), I would sew a bodice lining or put a ribbon over the seam.


Here are a few pics of the dress in action at the party.  We had it at my in laws cause they have a nice deck and in-closed backyard.  It was a small affair with a couple dozen delicious cupcakes from my favorite local cupcake bakery.  Yup, all that decoration planning was thrown out the window, and decorations were bought at Iparty.  It was a good day.


Maybe next year I'll spend less time pinning decorations and more time ACTUALLY making them.  Maybe.

Thursday, July 11, 2013

Starting a Project


I’ve been having a hard time completing my challenges on time…..not sure if you’ve noticed. 

I’m quick to blame Olivia for my tardiness (actually more like my inability to finish at all), but honestly, it’s more than just her.   


I’ll let you in on a little secret: I hate the process of actually starting a sewing project. I love buying patterns and love picking out the fabric, but after that I start stalling.

I don’t really mind washing the fabric…..but it slows everything down so much.  Then it has to be ironed, and that’s a pain.  Have you ever noticed how hard it is to iron really large yardages?  Ugh.   Once it’s ironed it’s time to place and cut out the pattern.  This is where everything really falls to pieces.  

I absolutely DREAD marking and cutting the pattern.  I’m not sure that the way I get my pieces cut out is the best method.  I’ve done a lot of research on the matter, and am just not sure if there is any NON-annoying to mark and cut out pattern pieces. 


When my mom taught me how to sew, she also taught me her method of marking out the pattern.  She pins the pattern down on the material, and then carefully traces her size all the way around.  When they are all marked she cuts out.   I’ve used this method for years, and it’s a real time (and back) killer.  Plus, if the fabric is dark, or shiny then marking it is just another issue entirely.  Another issue with marking I have is that I’ve never found the “holy grail” of marking tools.  Pencil works great on lighter colored cottons, but what do you use if you have a silky or dark colored fabric?  Lately, (and I feel like this is awful), I’ve been using Liv’s little Crayola markers.  They are bright, and are washable….right?   However, if I’m using Mumma Ouellette’s marking method the marker kinda gets everywhere……


The other method that I’ve been trying out lately is to trace the pattern onto freezer paper and  then trace it onto the fabric using pattern weights.  I like this method, but the tracing takes a while….and it makes me start to wonder if it’s really worth it.  I tell myself that it is, because if I want to make the item again then I don’t need to retrace everything.  But…..I haven’t made anything a second time yet……


Once the pattern is traced and ready to cut out, I’m basically in the clear.  I like the sewing part, and it goes pretty fast from there……as long as I don’t sit down on the couch before I start.  Once I’m on the couch it’s so hard trying to get myself off.


Is this a part of the sewing process that you hate.....or am I just a  terribly lazy person :) 

Tuesday, June 11, 2013

Challenge - Week 3 & 4

Here I am, late AGAIN with my sewing challenge entry. ….lol. I was completely ready last night to sit down with the ipad and type out my entry. I even have a sweet app on the ipad for blogging (Blogsy…and I paid for it too!).

But, while I was rocking Liv, I got a text from my sister in law asking if she could borrow the car so that she could go out with her friends. I told her I didn’t care (I really don’t) and she said she would be by with her friends to get it in a little bit.

After Liv went to sleep and I tip toed (and I mean tip toed, this kid is the lightest sleeper ever), down the stairs I realized that the sink was full. Not wanting the friends to see the squalor I live in, I mustered up all my housekeeping strength and did the dishes. But, the trick was on me….they never even came in.

So the dishes were done for nothing, except cleanliness. What a waste! Somehow we have been living in our house for over a year and it still looks like we just moved in. Can I just keep blaming the toddler? Please? pLease?

Alright, It’s probably time for the actual topic of this post now. Since I was a delinquent last week with the challenge post, I am going to do #2 and #3 here.

Challenge #2 - Polka Dots

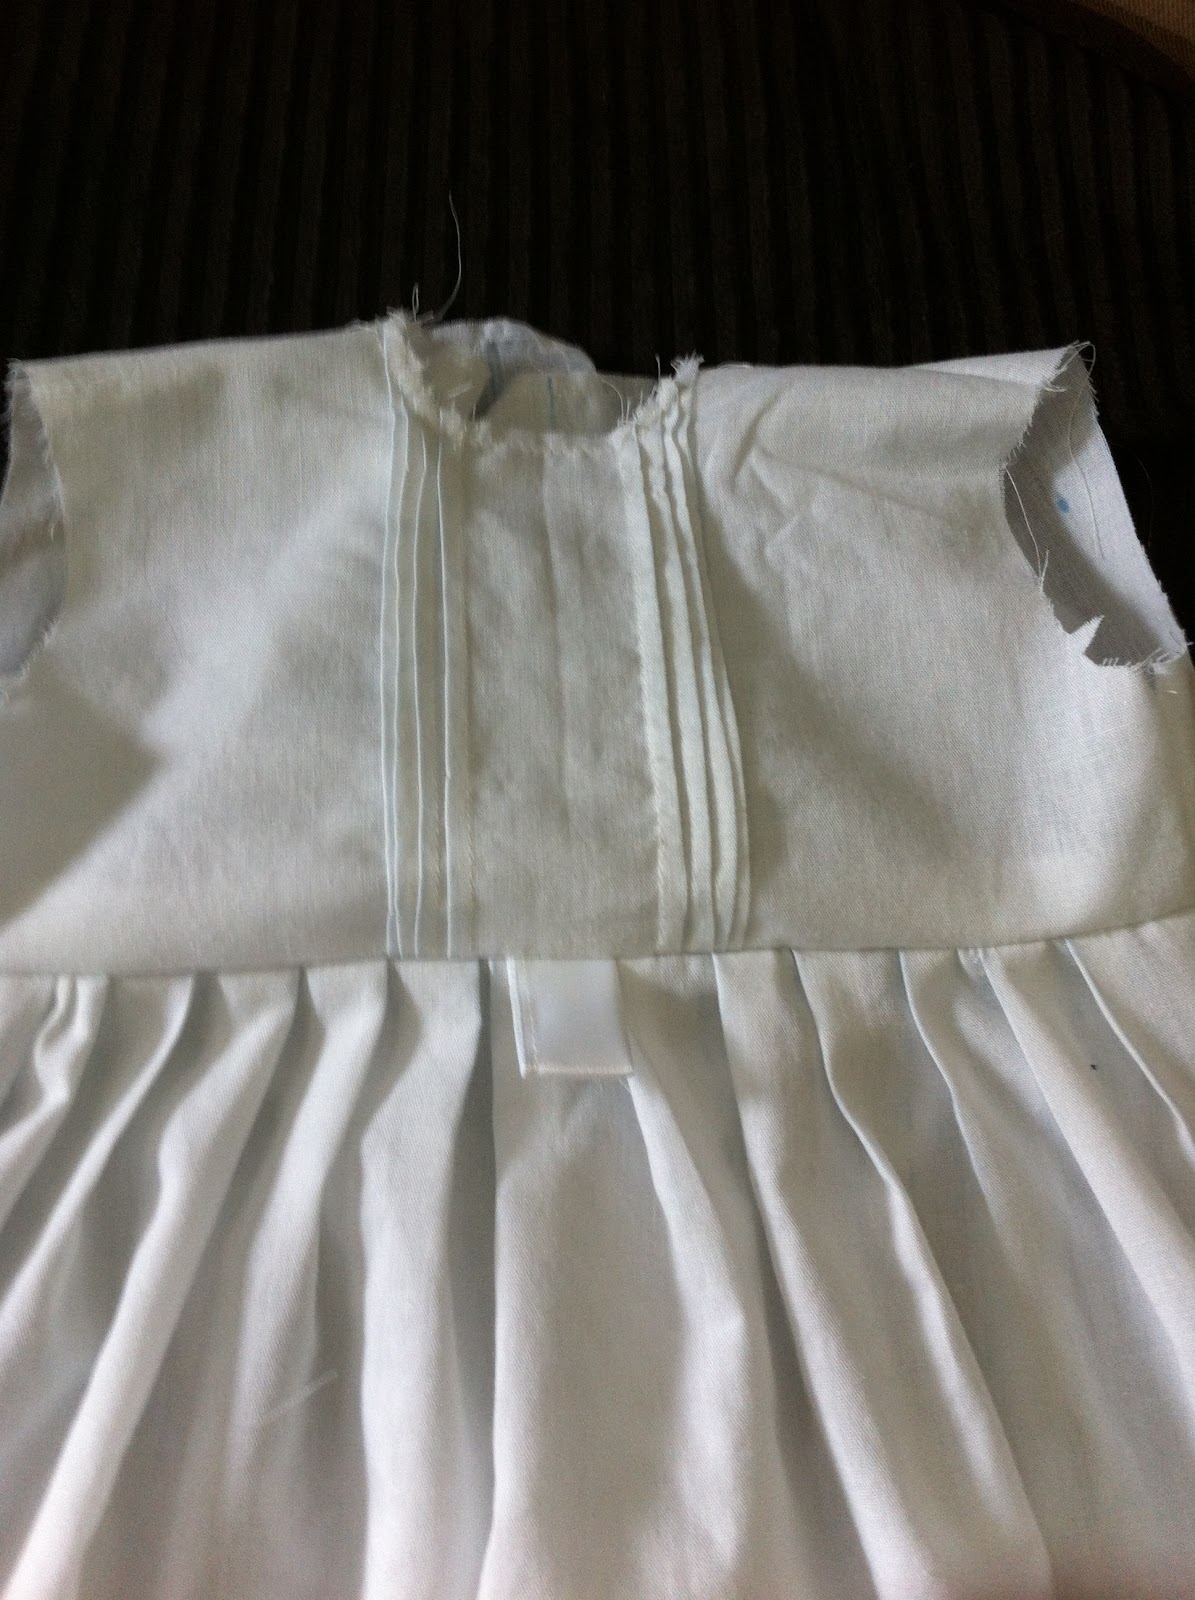
I GREATLY, GREATLY underestimated how long this dress was going to take me to make. It honestly looked so simple to me, and even seemed simple the first time I read through the instruction. I was wrong.


The pattern that I used was the Oliver & S Birthday dress. This was the first time I had ever used a pattern from an independent pattern maker. I have basically always made Simplicity or McCall’s, with a few Butterick mixed in (but they aren’t really my style for the most part). I thought this garment came out absolutely beautiful, but I felt like I had a really hard time visualizing what they were telling me to do in the directions. I had to read through them a bunch of times to actually understand what I was supposed to do.


Attaching the Hem facing nearly killed me. I just COULD not understand how I was supposed to do it. It seemed from the picture in the instructions that you were supposed to unfold the overhang on each side, and line it up to the edge…. But then it was just way too short. I sewed, and unpicked, and sewed and unpicked and sewed and unpicked. Finally, I actually thought that I may have cut out the wrong pattern size. I pulled out all of my freezer paper patterns (I’ve been doing this lately, and am not quite sure how I feel about it yet), and the actual patterns. Turns out I did make a size Three….I was absolutely stumped.


Out of sheer desperation I decided to Google, “Oliver and S birthday Dress Hem facing”. Turns out they have a user community on their website!! YAY!! I was able to find a forum post about the dress, and FINALLY understood what to do!!

Also, I had a hard time with the pleats. I never mark lines on the right side of the fabric when I’m supposed to. I’m okay with how they came out….but I wouldn’t say I’m in love with them.

I am excited to try my other Oliver & S patterns. I thought that the dress looked so finished and professional looking. Mass produced patterns just don’t take the same care to make sure that the inside looks nice.

Finally, the more clothing I sew the more I feel like I need a serger………….

Challenge #2 – Zip me Up!

I know you are all going to think it….so I’ll just say it….I called it in on this challenge. I KNEW that I wasn’t going to be able to finish a project from scratch this week, since I was working on the polka dot project until Wednesday. Zip it up was more of a refashioning project for me….

I was shopping in the clearance section of Target (baby free…one of life’s great pleasures) and saw this cute high low tank top. I thought to myself, “This would be just adorable with an exposed zipper”. Eight dollars and an hour later and TA DA!! Sewing challenge #3 is done!


I think it looks really cute. Thanks to Hubs for taking the pictures, and to Olivia for just having to be in them.

Next week’s challenge is Swim Cover-up. I’m pumped. Already have my fabric and pattern picked out. My fresh husband actually said to me, when I told him I was stopping at the fabric store on the way home from work yesterday to get the fabric, “Wait, you aren’t just going to sew zippers onto already made clothes from now on?”. Freshy ……..fresh………….. fresh.

Don’t forget to head over to my sister’s blog and look at her projects (she’s way more on the ball than me)!! I want her polka dot project by the way………


Wednesday, June 5, 2013

Sneak Peek

So......I'm two days.....almost three on my sewing challenge post/project this week. 

Oops!

Lots of factors have gone into this delinquency. To start things off I GREATLY under estimated how long it would take me to sew the garment I chose.

 Also, I greatly OVER estimated how easily I would be able to get Olivia into Minnie bed at night. This girl has been acting like the typical two year old for the last week. I used to be able to get her to sleep really easily if I wore her out during the day or she skipped her nap. Lately, this has only made her more cranky and harder to get to sleep. 

Finally, I chose an Oliver & S pattern as my inspiration this week. I'd never used an Oliver&S pattern before, or anyindependent  pattern maker for that matter. I found some of theinstructions difficult  to understand. 

That all being said, its coming out beautifully! 

Here's a little sneak peek...full post with   pictures soon


Tuesday, May 28, 2013

Challenge - Week 1

This week's prompt for the sewing challenge was "Work and Play". I had sewers block. Bad.

I failed week one.

The week started with promise. I had a day off the Thursday before, new patterns and new fabric. I decided to do a little shopping and gardening on my day off before I started sewing...... Bad idea. Right around dinner the vomiting started. When all was said and done I was sick for about a week.

When the vomiting ended, a fever set in. I had a fever for a couple days, which i think caused my mouth to erupt in canker sores. Canker sores all through my mouth and down my throat. It was excruciating. All this time I tried so hard to decide what to do for the challenge. I just couldn't do it. I kept obsessing over my choice, thinking that maybe there was a better choice i could make. It was insane. So, nothing got started.

Also, there was a lot of sleeping on the couch.

I did start making a quilt for Olivia's baby. The quilt top went together pretty easy, minus a small mistake i made while cutting (I need serious practice with my rotary cutter). I'm having a SUPER hard time quilting it though. Ive tried hand quilting machine quilting and it just keeps bunching. I'm tempted to just tie it....but maybe i'll do a little quilting research today at work before i resort to that.

Next weeks challenge: Polka Dot.....and I'm actually doing this one. I already have an idea, fabric, pattern and supplies. Just need to start cutting.


Hubs is working a lot this week, maybe Ill have enough time to do last weeks too.....maybe.

Sew What it's Summer Challenge

A few weeks ago I decided to try to force myself to sew more of my own clothes.  While talking to my sister about it, she came up with the idea of doing a sewing challenge to keep us motivated. I thought why not ...right?

We decided to call the challenge "Sew What it's Summer".....cute right?  The challenge goes from May 19th to September 2nd, and has been divided into 16 weeks.  Each of us came up with 8 challenges.  Apparently, Manda came up with challenges that she had plans for..... me....I just thought of cool things I wanted to wear........

Here they are.....

Week#1 Starting Date Challenger Challenge
1 5/20/2013 Amanda Work and Play
2 5/27/2013 Margie Polka Dot
3 6/3/2013 Amanda Zip Me Up
4 6/10/2013 Margie Swim Cover Up
5 6/17/2013 Amanda Ombre
6 6/24/2013 Margie Maxi Dress (2 week challange)
-- 7/1/2013 BREAK BREAK
7 7/8/2013 Amanda Retro Rundown
8 7/15/2013 Margie Chambray
9 7/22/2013 Amanda Bejeweled
10 7/29/2013 Margie Nautical
11 8/5/2013 Amanda Waste Not Want Not
12 8/12/2013 Margie Anthropologie Knock off
13 8/19/2013 Amanda Hidden Treasure
14 8/26/2013 Margie Black & White
15 9/2/2013 Amanda My Style icon would wear that.
16 9/9/2013 Margie Inspired

Rules of the Game:
All challenges last a week. Start the week's challenge on Monday, finish by Sunday @ midnight and blog about it by Monday @ midnight.  Make sure when you blog about about that you include the tag or label #sewwhatitssummer.

That's it - everything else with the challenge is fair game. Get ready for some great projects and looks soon to be displayed on this site :) And don't forget to check out my sister Manda's Blog.

Tuesday, November 6, 2012

Christening Dress


In February Hubs and I had Olivia christened. She was about nine months old. Most of the time the babies are much younger at a christening. We put it off a little longer than I (or our very Catholic families) had wanted to....but her arrival into this world was a little bit more eventful than we had expected.

Before she was born I was DEAD SET on making her Christening gown, but as things got busier my resolve waned. I ended up doing a lot of online gown shopping before I made my final decision to make the gown. Everything I saw online was so shiny or expensive.....or both. I wanted Olivia to look like a baby in a pretty white gown.....not a bride.

So, it was decided, I would make the gown. I had bought this pattern from Simplicity:

image via Simplicity.com

I liked the lace in View A, but I liked the bodice in View B and decided to meld them together. I decided on cotton batiste as my fabric and ordered everything I needed from Fabric.com. This is in no way a sponsored post for Fabric.com (because my blog really isn't popular enough for those), but they were FABULOUS. I got everything I needed....even the buttons, all from one place, only had to pay shipping once, and didn't have to wait in a long line (while trying to juggle a bolt of fabric and a squirmy baby) at the fabric store to have my material cut. It was amazing....and only cost me $35. I was a happy mommy. Oh wait, I just remembered, I got the lace at Joann's.....so I got almost everything at Fabric.com. Still counts. I remember obsessing over the lace. I wanted it to be just perfect.

I took pictures on my iPhone while sewing, so bear with me......


The bodice had pin-tucks on both sides of the center. They really didn't turn out as perfectly as I had hoped, and I really couldn't figure out why. I took them out and resewed them a couple of times, but it always came out the same way. After the second time redoing them I gave up and hoped it wouldn't be so noticeable to everyone else.
The pintucks on the bottom of the gown came out MUCH better. Of course my stitching could have been a tiny bit straighter, but all in all I thought it looked good. I love how the ipod cord and baby toy just snuck into the pic......


All together, no sleeves or collar, but all the hard work done. I ended up having to tack down the top row of lace because it just didn't want to stay upside down.

Completed! Isn't it so pretty?? Honestly, I think it's probably the nicest thing I have ever made. I should have taken a picture of the seams on the inside too, cause I made sure that they were all done nice and neat as well.


Linking up at a few parties.....

Monday, September 19, 2011

Daddy's Diaper Bag

Hubs needed a diaper bag, since mine was too "flowery" for him.  I decided I would try my hand at making one for him instead of buying it.  I used this tutorial as a guide. 


I added magnetic snaps to the front flap for a closure.  I had never done this before, but had bought some for a project I never finished ages ago.  It was a lot easier to add them than I had anticipated and I think it gave the bag an almost store bought look.


 In the tutorial they made the strap out of the same material as the bag.  I bought some belt webbing (is that what it's really called even? I don't know) because I thought it may look more "manly".  When I got to the strap part, I thought it looked a little narrow, so I put two pieces together and zig-zagged them.  I think it looks pretty cool.


The lining was made of just a basic muslin and has three pockets on one side and two on the other.  The tutorial suggested using vinyl to make it easier to clean...but I was scared.  I've never sewn with vinyl before.  I didn't think this was the project to start!


 There's plenty of room inside for all the things that Daddy's need to keep their baby girl's happy.


Two more pockets on the front.  I can't think of what I use these for when I pack the bag for Hubs.  Maybe pacifiers?


And finally, there is one zippered on the back.


I'm really happy with how the bag came out.  I think it looks really good, and, best part, Hubs actually uses it. Now if I could only get him to empty it of bottles and poopy clothes..... one step at a time I guess.

Monday, August 15, 2011

Bathtime for Violet

My friend Heidi is having her second daughter any day now.   I wanted to make her a little something for the baby and had been scouring the internet for ideas for weeks.  I settled on making her a hooded bath towel and washcloth from this tutorial  


While I was still on maternity leave I had gone to the fabric store with my mom and bought some flannel fabric that was purple with fairies on it.  I had loved it and thought I would make another changing table pad cover for Olivia.  She had taken to pooping on her changing table cover and it was always dirty.  Right after I bought it we got a gift card to Babies R Us in the mail from one of our friends.  I love sewing, but being a new mother is tiring.  All Carter's was on sale at Babies R Us for buy one get one 50% off.  I think you can see where the story is going.  The changing table pad covers were bought.  Now that we have three Olivia is dirtying them next to never. 

The fabric was just waiting for something adorable to be made out of it. A few weeks ago Heidi had posted some pictures of the baby's room to Facebook.  I saw on the wall that the name "Violet" was written out in wooden letters. When I saw that the new baby's name would be Violet I knew immediately that I must use it for her gift.  Not only was the fabric soft and cute, but it was light purple!!  At first I thought I would make the towel part out of this brown terry fabric that I have in my stash.  However, currently my stash is in the very bottom of Olivia's closet, underneath her baby tub, and a load of other stuff.  I got lazy and decided to buy this pretty purple towel from Ikea.


The tutorial called for a 30X30 square but the towel was 28X55.  I thought I'd just cut a 28X28 square.  Easy right?  Somehow my cutting ended up so so wrong.  I cut the towel.  Then I cut the fabric.  Did I cut the fabric crooked on one side.  Of course I did.  I cut it again.  Second time's the charm right? Nope.  The fabric and the towel were absolutely NOT the same size.  At this point, I didn't have enough fabric left to try again, so I made due.  I have no idea what happened.  Either Ikea lied about the dimensions of their towel, it stretched, or I am just HORRIBLE with measurements.  

Helping Mommy sew 
Mom! I'm falling!!
Just as a side note....Have you ever cut a towel.  Little pieces of terry get EVERYWHERE.  It almost looked like Grimace had shed all over our couch.

Once I had the fabric and the towel laid on top of each other and pinned I started on the binding.  I bought purple bias tape for the binding (well actually my sister bought it for me cause I couldn't find it at my fabric store). I usually make my own bias tape, but when one has a newborn time saving methods must be used.  The tutorial instructions said to just sandwich the binding around the edges.  I thought that would be MUCH harder than just using the two step method to putting on the binding.  I did it my way and then zig-zagged the edges.  It didn't line up perfectly on the edge on both sides, but I didn't mind.  I thought it made the towel look whimsical?  What do you think? 


Next I tackled the washcloths.  I made those out of scraps of the towel.  Instead of making them with both fabrics like the hooded towel, I decided just a fairy on each side as decoration.  I used the zig-zag stitch to sew the fairies on, and again, the stitching didn't line up perfectly on both sides, and whimsy ensued.


I'm actually really happy with how everything turned out.  It wasn't as easy as I thought it would be, but the end result looked adorable.  Hopefully, Baby Violet will love her bath set!!


Linking this to a few parties :)


Creative Itch


Blog Template by YummyLolly.com - Header Frame by Pixels and Ice Cream
Sponsored by Free Web Space